This document describes how to compile and run Apollo locally using the IDE so that it can help you understand the inner workings of Apollo and also prepare you for custom development.
#
# I. Preparation
## 1.1 Local Runtime Environment
Apollo local development requires the following components.
1. Java: 1.8+
2. MySQL: 5.6.5+ (If you plan to use H2 in-memory database/H2 file database, then there is no need to prepare MySQL)
3. IDE: No special requirements
MySQL is required to create Apollo database and import the base data.
Please refer to the following sections in [distributed-deployment-guide](en/deployment/distributed-deployment-guide) for the specific steps.
1. [Preparation](en/deployment/distributed-deployment-guide?id=i-preparation)
2. [Create database](en/deployment/distributed-deployment-guide?id=_21-creating-the-database)
## 1.2 Apollo general design
Please refer to [Apollo Configuration Center Design](en/design/apollo-design) for details.
# II. Local startup
## 2.1 Apollo Assembly
When we develop locally, we usually start `apollo-assembly` in the IDE.
The following is an example of how to start `apollo-assembly` locally with Intellij Community 2016.2 version.
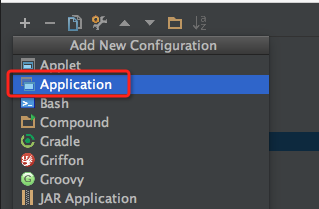
### 2.1.1 Create a new running configuration
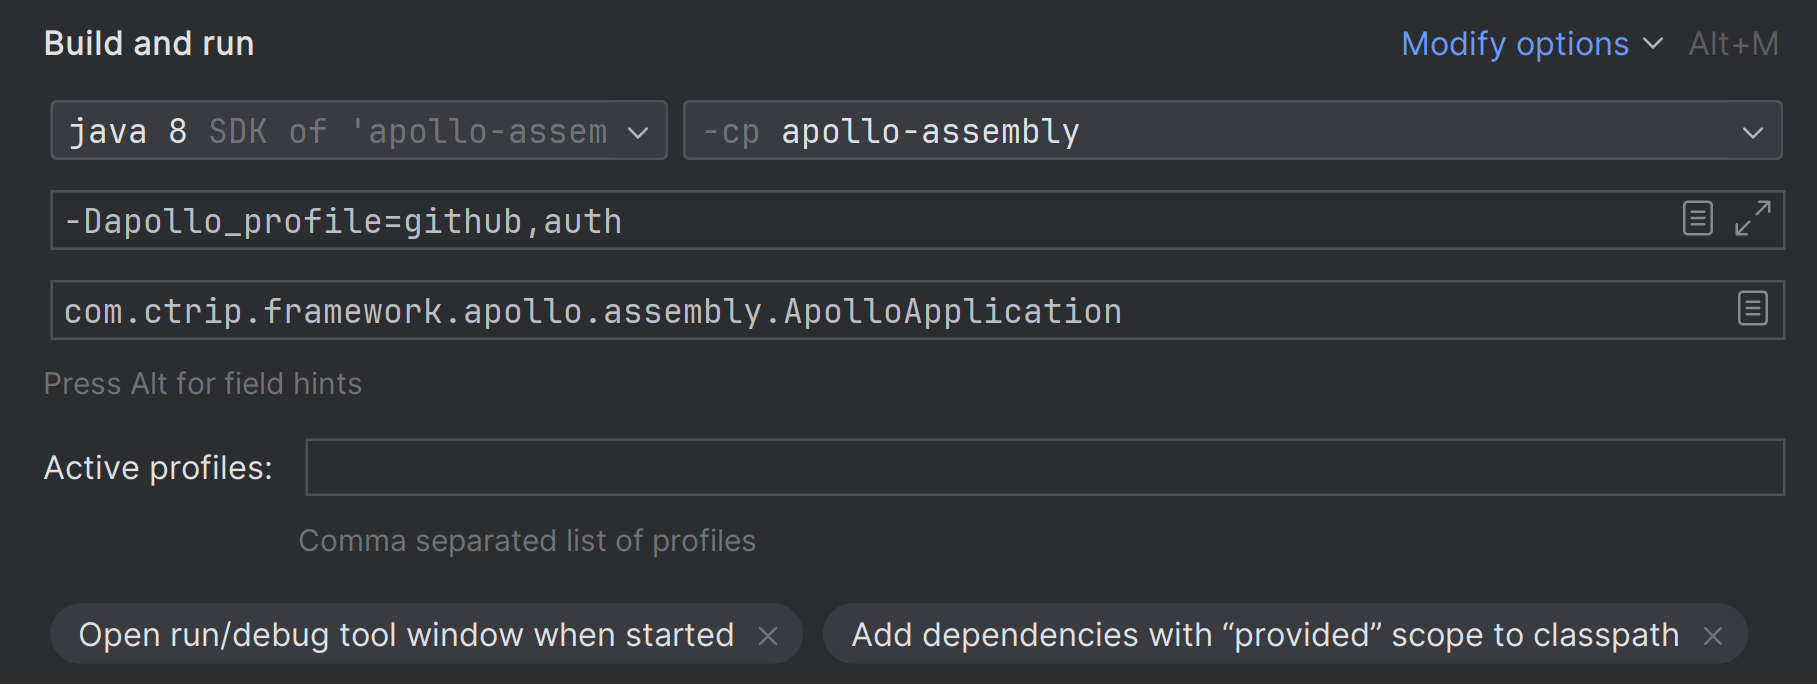
### 2.1.2 Main class configuration
`com.ctrip.framework.apollo.assembly.ApolloApplication`
> Note: If you want to start `apollo-portal`, `apollo-configservice` and `apollo-adminservice` independently, you can replace Main Class with
> `com.ctrip.framework.apollo.portal.PortalApplication`
> `com.ctrip.framework.apollo.configservice.ConfigServiceApplication`
> `com.ctrip.framework.apollo.adminservice.AdminServiceApplication`
### 2.1.3 VM options configuration
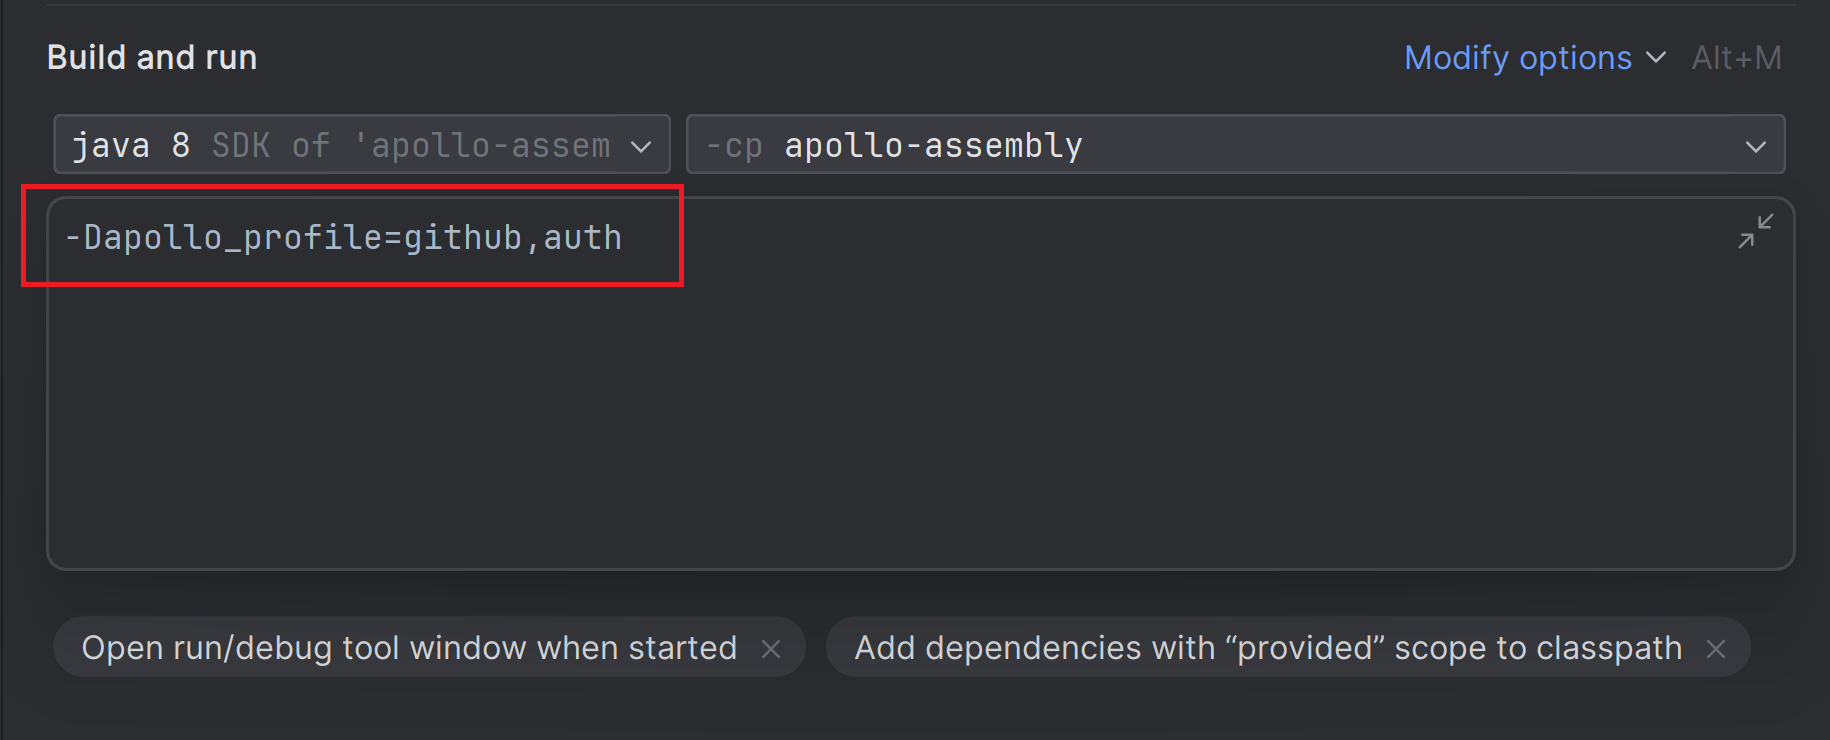
```
-Dapollo_profile=github,auth
```
>Note 1: apollo_profile is specified here as `github` and `auth`, where `github` is a profile required by Apollo for database configuration, and `auth` is added from 0.9.0 to support simple authentication using Spring Security provided by apollo. For more information you can refer to [Portal-implement-user-login-function](en/development/portal-how-to-implement-user-login-function)
>
>Note 2: If you plan to use a MySQL database, you need to add `spring.config-datasource.*` related configuration,
> the your-mysql-server:3306 needs to be replaced with the actual mysql server address and port,
> ApolloConfigDB and ApolloPortalDB needs to be replaced with the actual database name,
> apollo-username and apollo-password need to be replaced with the actual username and password
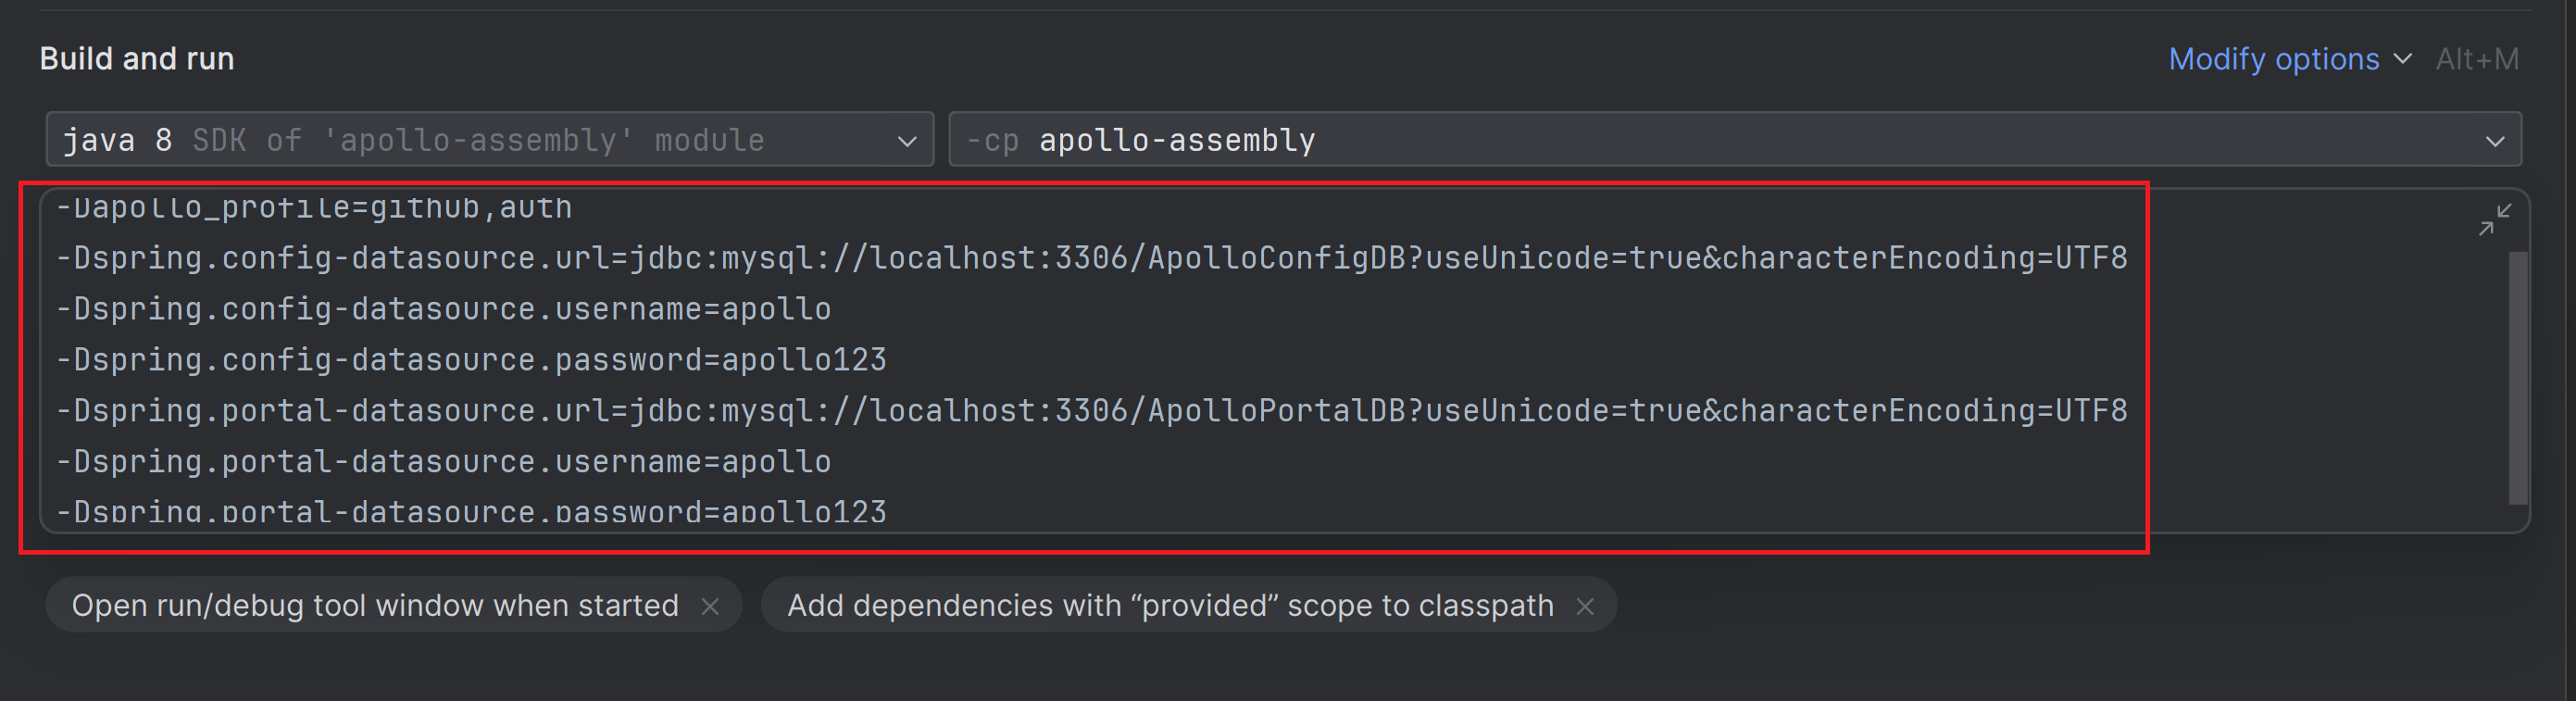
```
-Dspring.config-datasource.url=jdbc:mysql://your-mysql-server:3306/ApolloConfigDB?useUnicode=true&characterEncoding=UTF8
-Dspring.config-datasource.username=apollo-username
-Dspring.config-datasource.password=apollo-password
-Dspring.portal-datasource.url=jdbc:mysql://your-mysql-server:3306/ApolloPortalDB?useUnicode=true&characterEncoding=UTF8
-Dspring.portal-datasource.username=apollo-username
-Dspring.portal-datasource.password=apollo-password
```
The initialization script for the MySQL database can be found in the scripts/sql/profiles/mysql-default directory of this project.
[apolloconfigdb.sql](https://cdn.jsdelivr.net/gh/apolloconfig/apollo@master/scripts/sql/profiles/mysql-default/apolloconfigdb.sql)
[apolloportaldb.sql](https://cdn.jsdelivr.net/gh/apolloconfig/apollo@master/scripts/sql/profiles/mysql-default/apolloportaldb.sql)
>Note 3: The default log output of the program is /opt/logs/apollo-assembly.log, if you need to modify the log file path, you can add the `logging.file.name` parameter, as follows.
>
>-Dlogging.file.name=/your-path/apollo-assembly.log
### 2.1.4 Run
Click Run or Debug for the new run configuration.

After starting, open [http://localhost:8080](http://localhost:8080) to see that both `apollo-configservice` and `apollo-adminservice` have been started and registered to Eureka.
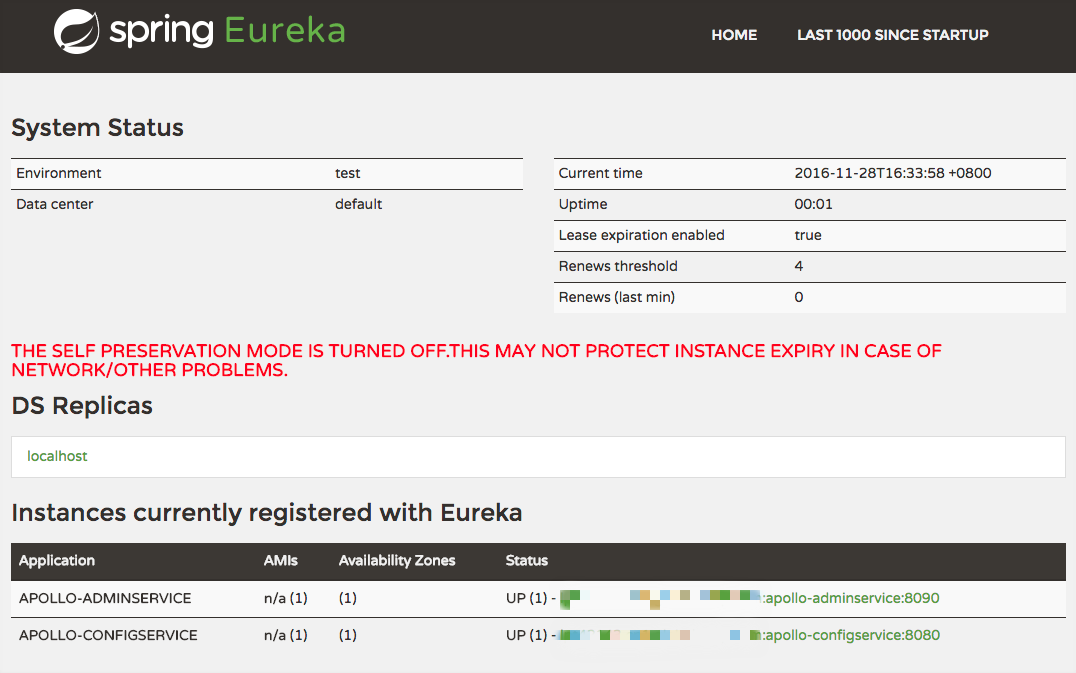
> Note: In addition to confirming the service status in Eureka, you can also confirm the service health through the health check interface at.
>
> apollo-adminservice: [http://localhost:8090/health](http://localhost:8090/health)
> apollo-configservice: [http://localhost:8080/health](http://localhost:8080/health)
>
> If the service is healthy, the status.code in the return content should be `UP`.
>
> {
> "status": {
> "code": "UP",
> ...
> },
> ...
> }
After starting, open [http://localhost:8070](http://localhost:8070) to see the Apollo Configuration Center interface.
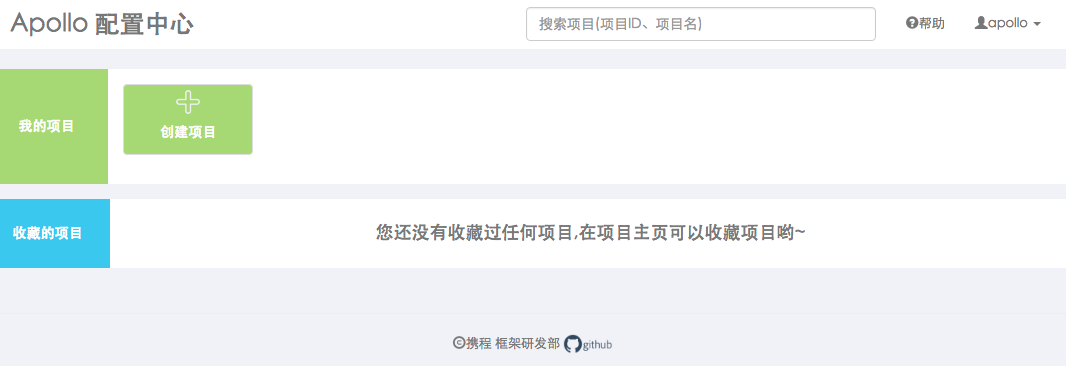
>Note: If `auth` profile is enabled, the default username is apollo and password is admin
### 2.1.5 Demo application access
For better development and debugging, we usually create a demo project for our own use.
You can refer to [General Application Access Guide](en/portal/apollo-user-guide?id=i-general-application-access-guide) to create your own demo project.
## 2.2 Java sample client startup
There is a sample client project: [apollo-demo-java](https://github.com/apolloconfig/apollo-demo-java), the following is an example of how to start it locally with Intellij.
### 2.2.1 Configure the project AppId
When creating a demo project in `2.2.5 Demo Application Access`, the system will ask to fill in a globally unique AppId, which we need to configure into the app.properties file of the `apollo-demo` project: `apollo-demo-java/api-demo/src/main/resources/ META-INF/app.properties`.
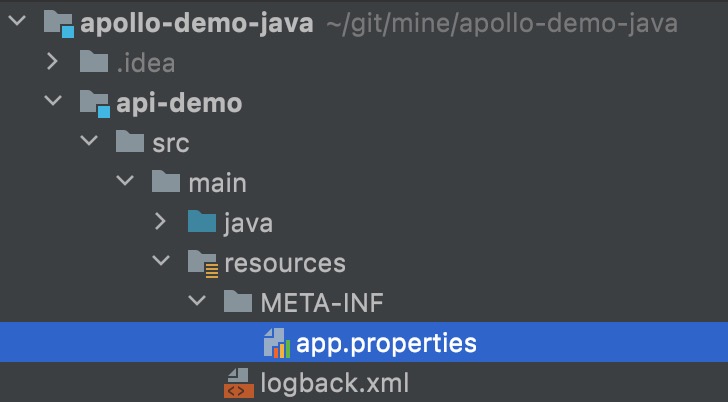
If our own demo project uses an AppId of 100004458, then the file content would be
app.id=100004458
>Note: AppId is the unique identity of the application, which is used by Apollo clients to get the application's own private Namespace configuration.
> For public Namespace configurations, you can get the configuration without the AppId, but then you lose the ability for the application to override the public Namespace configuration.
> More ways to configure AppId can be found in [1.2.1 AppId](en/client/java-sdk-user-guide?id=_121-appid)
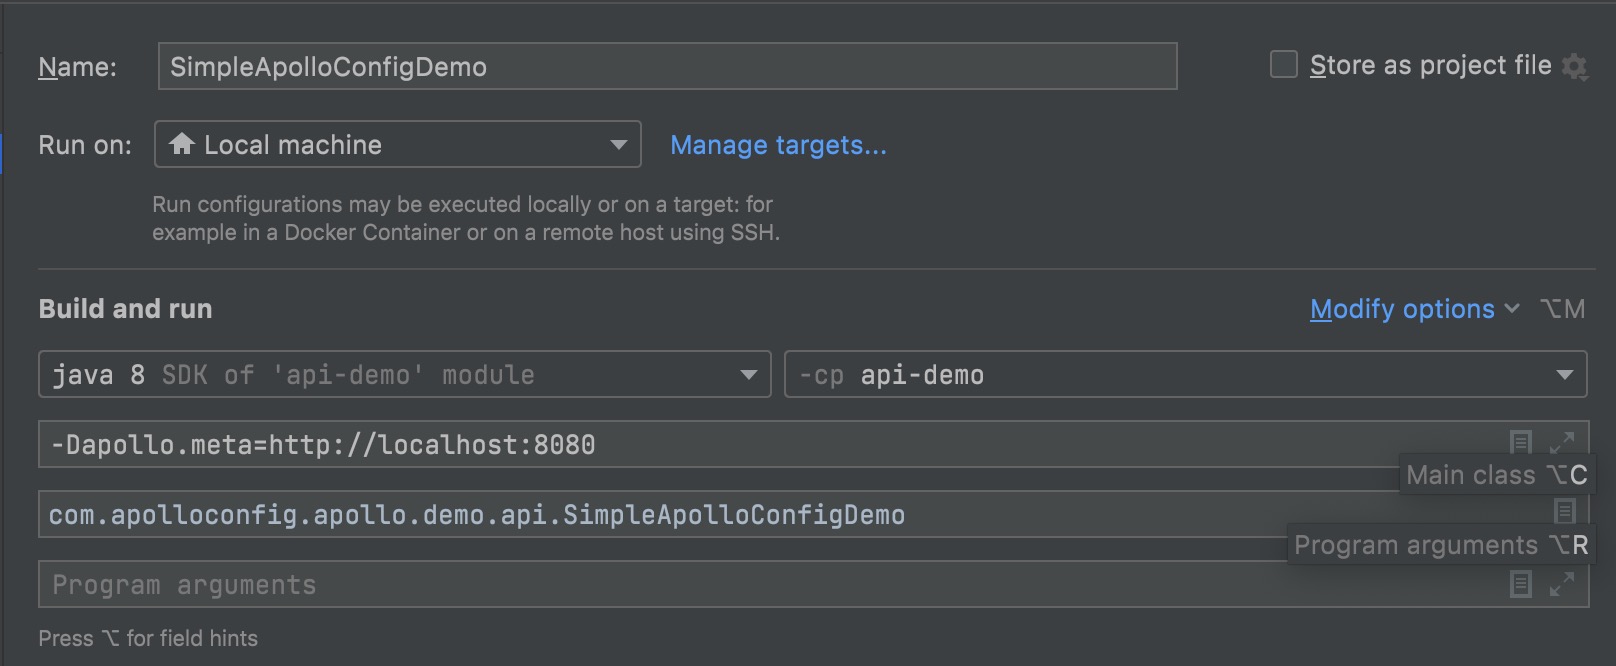
### 2.2.2 New run configuration

### 2.2.3 Main class configuration
`com.apolloconfig.apollo.demo.api.SimpleApolloConfigDemo`
### 2.2.4 VM options configuration
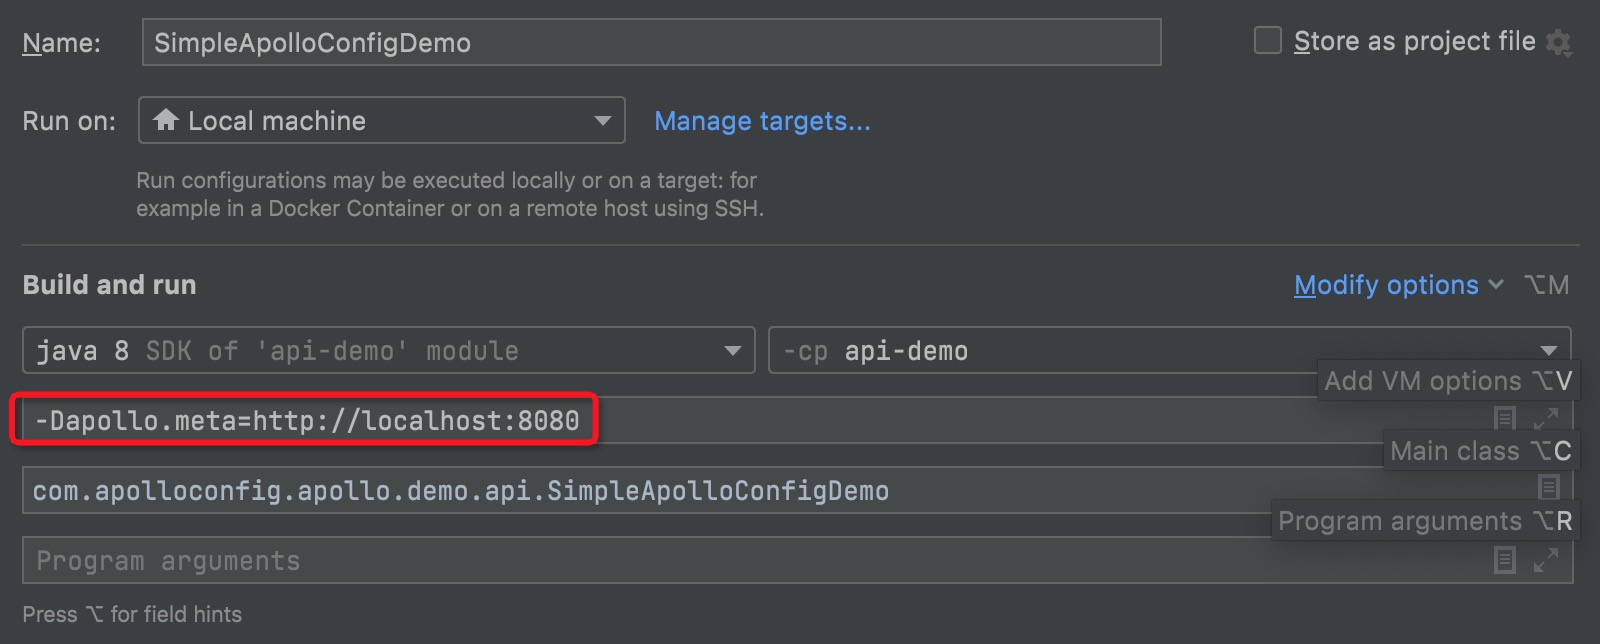
-Dapollo.meta=http://localhost:8080
> Note: Here the current environment's meta server address is `http://localhost:8080`, which is also the address of `apollo-configservice`.
> For more ways to configure Apollo Meta Server, please refer to [1.2.2 Apollo Meta Server](en/client/java-sdk-user-guide?id=_122-apollo-meta-server)
### 2.2.5 Overview
### 2.2.6 Running
Click Run or Debug on the newly created run configuration.

After starting, ignore the previous debug message and you will see the following message.
Apollo Config Demo. Please input key to get the value. Input quit to exit.
>
Enter the value you have configured on the Portal, such as `timeout` in our demo project, and you will see the following message.
> timeout
> [SimpleApolloConfigDemo] Loading key : timeout with value: 100
> The default client log level is `DEBUG`, if you need to adjust it, you can modify the level in `apollo-demo/src/main/resources/log4j2.xml`.
>
> ```xml
>
>
>
## 2.3 .Net sample client startup
The [apollo.net](https://github.com/ctripcorp/apollo.net) project has a sample client project: `ApolloDemo`, here's an example of how to start it locally with VS 2010.
### 2.3.1 Configuring the project AppId
When creating a Demo project in `2.2.5 Demo Application Access`, the system will ask to fill in a globally unique AppId, which we need to configure into the App.config file of the `ApolloDemo` project: `apollo.net\ApolloDemo\App.config`.
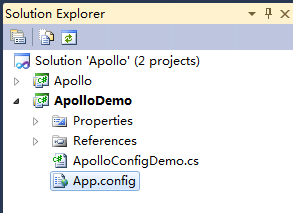
If our own demo project uses an AppId of 100004458, then the contents of the file would be
```xml
```
> Note: AppId is a unique identifier for the application, which Apollo clients use to get the application's own private Namespace configuration.
> For public Namespace configurations, the configuration can be obtained without the AppId, but the ability of the application to override the public Namespace configuration is lost.
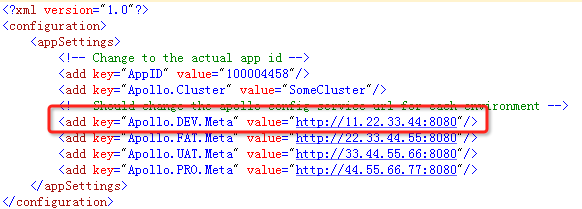
### 2.3.2 Configuring Service Addresses
Apollo client will get the configuration from different servers for different environments, so we need to configure the server address (Apollo.{ENV}.Meta) in app.config or web.config. Suppose the DEV environment's configuration service (apollo-config service) address is 11.22.33.44, then we will do the following configuration.
### 2.3.3 Running
Just run `ApolloConfigDemo.cs`.
After starting, ignore the previous debugging message and you will see the following prompt.
Apollo Config Demo. Please input key to get the value. Input quit to exit.
>
Enter the value you configured on the Portal, such as `timeout` in our demo project, and you will see the following message.
> timeout
> Loading key: timeout with value: 100
>Net client will output logs directly to the Console by default, so you can implement your own logging-related features.
>You can implement your own logging-related functions.
>See [https://github.com/ctripcorp/apollo.net/tree/master/Apollo/Logging/Spi](https://github.com/ctripcorp/apollo.net/tree/master/) for details Apollo/Logging/Spi)
# III. Development
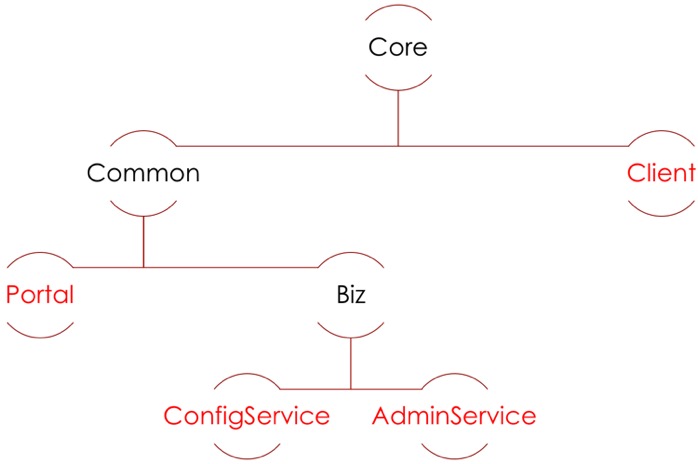
## Module dependency diagram
## 3.1 Portal implementation for user login
Please refer to [Portal implementation of user login function](en/extension/portal-how-to-implement-user-login-function)
## 3.2 Portal access to mail service
Please refer to [Portal Enabling Email Service](en/extension/portal-how-to-enable-email-service)
## 3.3 Shared session for Portal cluster deployment
Please refer to [Portal Shared Session](en/extension/portal-how-to-enable-session-store)